There's something about the glow of city lights or a sky full of stars that takes our breath away. But let's be honest—capturing that same magic in a photo isn't always easy.
Whether we're aiming for neon-lit streets or a milky way shot in the mountains, night photography takes a little planning and a lot of patience. Here's how we can make it work.
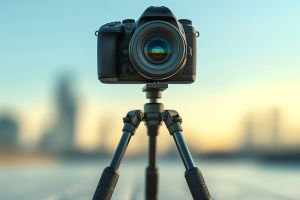
Get the right gear
We don't need the most expensive camera on the market, but certain tools help a lot. A camera with manual settings (even a good smartphone app can do this), a sturdy tripod to avoid shaking, and ideally a wide-angle lens for the sky are great starting points. For star photography, a remote shutter or timer helps prevent blur when we press the button.
Find a dark place
For star photos especially, light pollution is the enemy. We'll want to head somewhere away from city lights—countryside, mountains, or coastal areas. There are even apps and maps that show us dark sky locations. For city night scenes, though, we can use the glow of buildings and streets creatively, especially during "blue hour" (just after sunset or before sunrise).
Use manual mode
Shooting in auto mode usually doesn't cut it at night. We need to control three key settings:
• Aperture (f/stop): Use a wide aperture like f/2.8 or lower to let in more light.
• Shutter speed: For star trails or landscapes, we might need 15–30 seconds. Be careful—too long, and stars can blur from Earth's rotation.
• ISO: Start at ISO 800–1600. Higher ISO can make the photo brighter, but too much may add noise.
We'll need to experiment and adjust based on our location and how much light is around.
Focus manually and carefully
At night, autofocus often fails. Switch to manual focus and zoom in on a bright star or a distant streetlight using live view. Once it looks sharp, we're good to go. Remember, just a slight shift in focus can blur the whole image, so take your time here.
Use long exposure for magic
This is where the magic happens. A longer exposure (slower shutter speed) lets us capture movement—like star trails, flowing car lights, or shimmering water. A 15-second exposure can reveal way more stars than we can see with our eyes. For cityscapes, it smooths out lights and gives photos a dreamy feel.
Try star tracking or stacking
If we want clear stars with no motion blur, we can use the "500 Rule" to find the max shutter speed: 500 ÷ focal length = seconds before stars trail. For example, with a 20mm lens, 500 ÷ 20 = 25 seconds max. Want super sharp Milky Way shots? Some photographers take multiple short exposures and stack them using software to reduce noise and improve clarity.
Play with composition
Night photos aren't just about the sky or lights—they're also about what's in the frame. We can add trees, people, roads, or reflections to give our photo depth and story. For example, a tent glowing under a sky full of stars tells a richer story than just stars alone.
Edit with a light touch
Night photos often look better after editing—but let's not go overboard. Adjust contrast, reduce noise, bring out the stars or city lights a bit, and maybe shift color tones for mood. Apps like Lightroom or Snapseed can do a lot even on mobile. The goal is to enhance what we saw, not replace it.
Pack smart and stay safe
Night shoots mean we're out late or in remote areas. Let's pack snacks, dress warmly, bring a flashlight or headlamp, and let someone know where we're going. Safety comes first—especially in unfamiliar places or when we're shooting solo.
What's your favorite night scene?
So Lykkers, what kind of night photography excites you most—sparkling cityscapes or silent starlit skies? Grab your gear, find your spot, and take that first long exposure shot. The results might just surprise you.
Have you captured a photo that made you say "wow"? Share it with us—we'd love to see your take on the night.